
There’s something magical about pulling a tray of Stained Glass Cookies out of the oven, watching the colors swirl like a miniature cathedral window. I’ve always loved how these treats combine the buttery comfort of classic sugar cookies with that stunning, jewel-toned surprise in the center—it’s like edible art you can share at holiday parties or just enjoy on a quiet afternoon. Making Stained Glass Cookies at home isn’t as complicated as it looks, and trust me, once you try them, they’ll become a staple in your baking rotation. Here’s the thing: they’re perfect for anyone who wants to impress without spending hours in the kitchen.
In my experience, the key to perfect Stained Glass Cookies lies in using crushed hard candies that melt just right, creating those vibrant, translucent centers. I’ve made batches for family gatherings, and the oohs and aahs never get old—kids especially go wild for the colors. Now, you might be thinking, “Can I really pull this off?” Absolutely, and I’m excited to walk you through my go-to recipe that’s foolproof and full of flavor. Let’s dive in and create some cookie magic together.
Key Takeaways:
- Stained Glass Cookies offer a stunning visual appeal that’s perfect for holidays or special occasions.
- Prep and bake time totals under an hour, making them a quick treat for busy bakers.
- The buttery dough pairs beautifully with the sweet, colorful candy centers for a delightful crunch and melt.
- Chill the dough for at least 30 minutes to ensure clean cuts and easy handling.
- Store Stained Glass Cookies in an airtight container for up to a week to keep them fresh.
Why You’ll Adore This Stained Glass Cookies
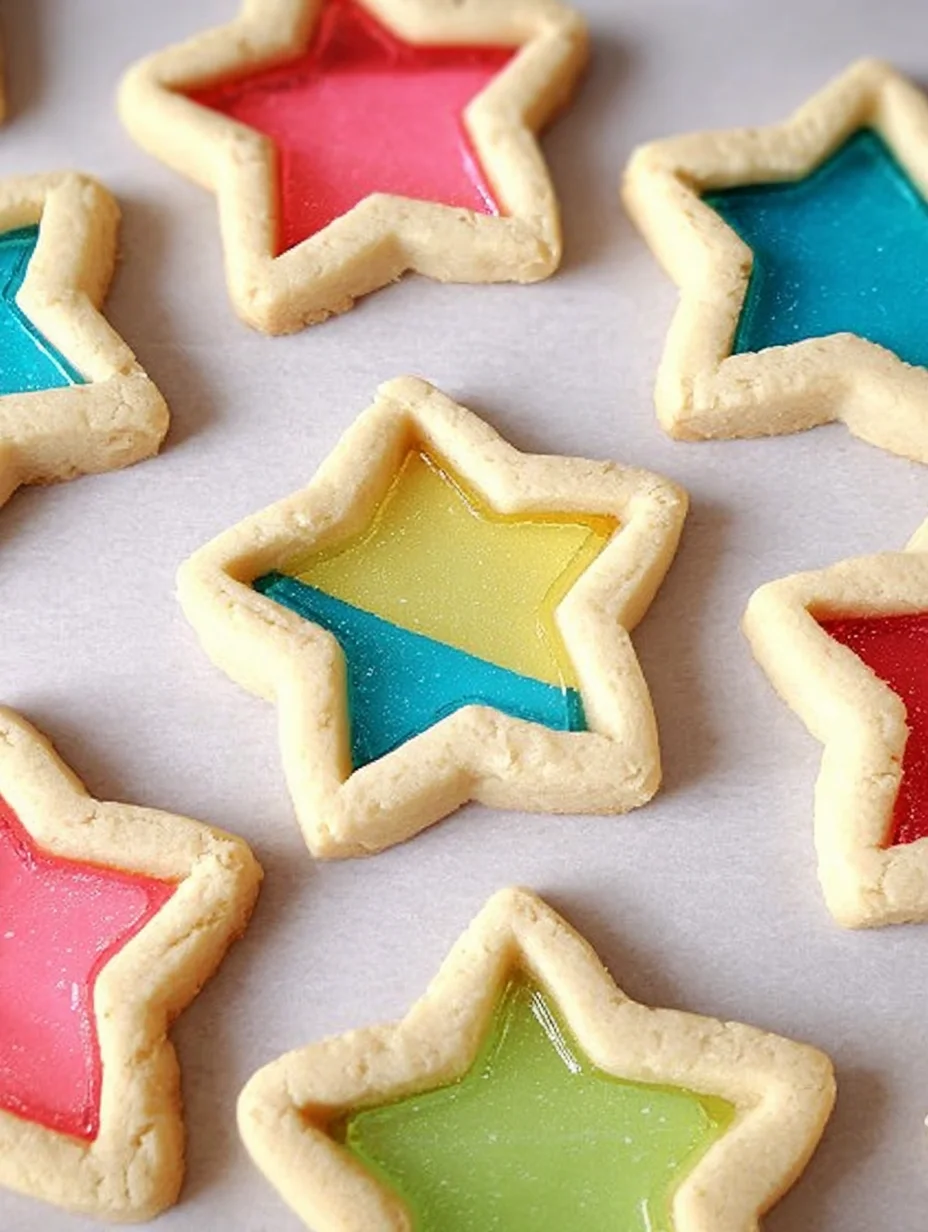
Stunning Visuals That Wow: Imagine biting into a cookie that looks like a piece of stained glass artwork—the crushed candies melt into vibrant colors that shine through the dough. These Stained Glass Cookies aren’t just tasty; they’re a conversation starter at any gathering. I’ve seen them light up faces at parties, turning a simple bake into something memorable.
Easy Customization for Fun: With a rainbow of hard candies, you can match the colors to any theme, from holidays to birthdays. It’s so satisfying to experiment and see how the hues blend. Let’s be honest, who wouldn’t love personalizing their treats this way?
Perfect Balance of Texture: The crisp edges of the cookie contrast beautifully with the chewy, translucent centers in these Stained Glass Cookies. Each bite delivers that delightful pop of flavor and color. In my experience, it’s this mix that keeps you coming back for more.
Beginner-Friendly Baking Joy: Don’t let the fancy look fool you; this recipe uses basic ingredients and simple steps anyone can follow. You’ll feel like a pro after your first batch. However, the real reward is sharing the happiness these cookies bring.
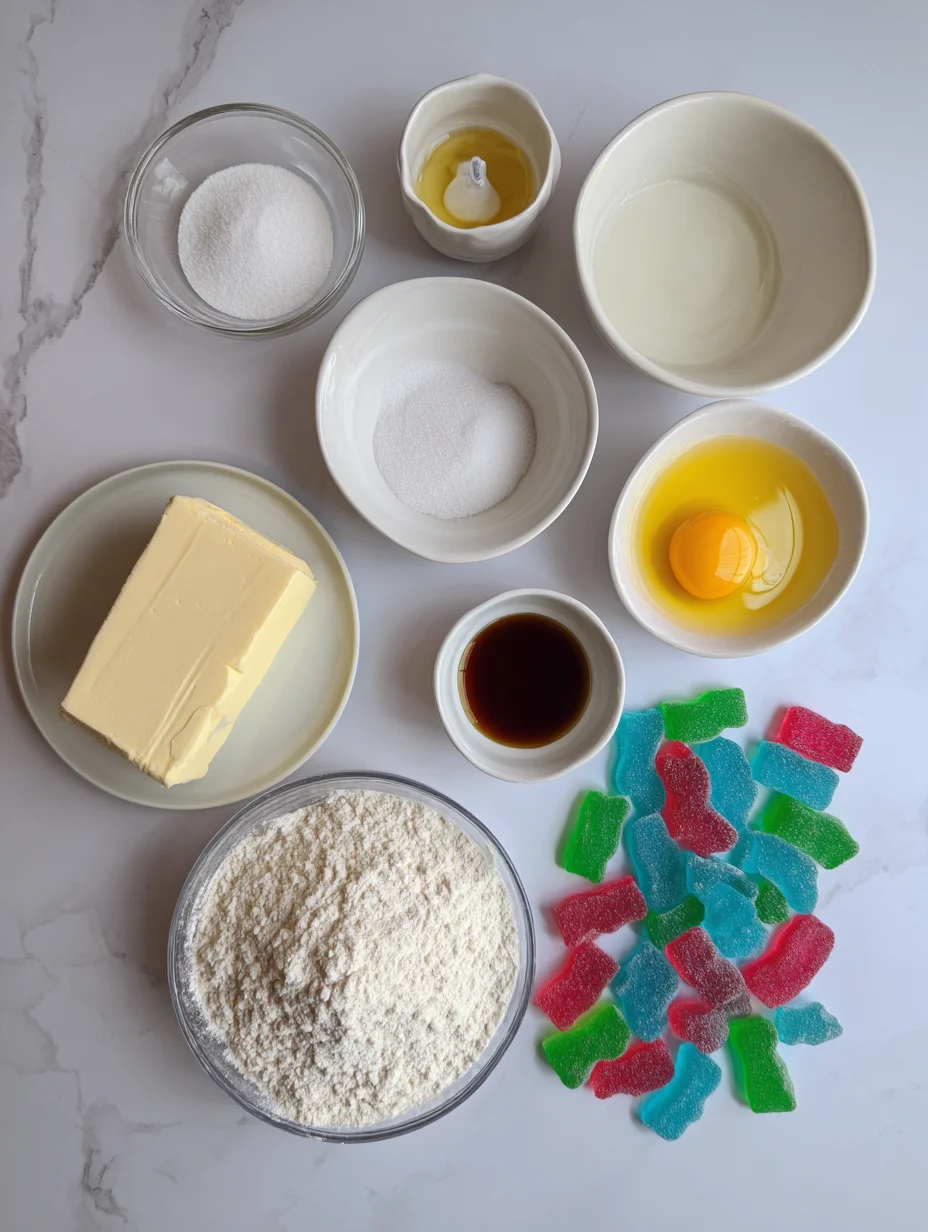
Essential Ingredients for Stained Glass Cookies
Unsalted Butter: Softened to room temperature, this is the heart of the dough, providing that rich, melt-in-your-mouth texture. It creams beautifully with sugar for a tender crumb. In Stained Glass Cookies, it ensures the edges hold their shape while the centers shine.
All-Purpose Flour: The backbone of the cookie structure, it gives the dough just the right amount of body without being tough. Sifted for smoothness, it helps the cutouts stay precise. I’ve found that high-quality flour makes a noticeable difference in the final snap.
Hard Candies: Crushed into small pieces, these create the signature stained glass effect as they melt during baking. Choose vibrant flavors like cherry or lime for pops of color and taste. They add a sweet, glassy center that’s the star of your Stained Glass Cookies.
How to Make Stained Glass Cookies
Prepare the Dough
Start by creaming together the softened butter and sugar in a large bowl until it’s light and fluffy—this usually takes about 2-3 minutes with an electric mixer. Beat in the egg and vanilla extract until fully incorporated, then gradually mix in the flour, baking powder, and salt to form a soft dough. Wrap it in plastic and chill for at least 30 minutes; this step is crucial for Stained Glass Cookies to prevent spreading. In my experience, a well-chilled dough makes shaping so much easier and more precise.
Assemble the Cookies
Preheat your oven to 350°F and line baking sheets with parchment paper for easy release. Roll out the dough on a floured surface to about 1/4-inch thickness, then use cookie cutters to create your shapes—stars or hearts work great. Cut out a smaller shape in the center of half the cookies and fill those holes with 1/2 teaspoon of crushed hard candies, arranging colors for a stained glass look. The sensory anticipation here is half the fun; you can almost imagine the colors blooming.
Bake to Perfection
Place the assembled Stained Glass Cookies on the sheets, ensuring even spacing, and bake for 8-10 minutes until the edges are golden and the candy centers are fully melted and bubbling slightly. Let them cool on the sheet for 5 minutes before transferring to a wire rack—the candy will harden into that beautiful translucent window. Watch closely to avoid overbaking; perfect timing gives you the ideal crunch and shine in every Stained Glass Cookies batch.
Ingredients
- 1/2 cup unsalted butter, softened
- 1/2 cup granulated sugar
- 1 large egg
- 1 teaspoon vanilla extract
- 1 1/2 cups all-purpose flour
- 1/2 teaspoon baking powder
- 1/4 teaspoon salt
- Assorted hard candies (like Jolly Ranchers), crushed, about 1/2 cup total
Stained Glass Cookies Instructions
- Cream butter and sugar until light and fluffy. Beat in egg and vanilla.
- Mix in flour, baking powder, and salt to form dough. Chill for 30 minutes.
- Roll out dough, cut shapes, and create center cutouts on half the cookies.
- Fill centers with crushed candies. Bake at 350°F for 8-10 minutes.
- Cool on sheet, then transfer to rack. Enjoy your colorful creations!
Pro Tips for the Best Stained Glass Cookies
Chill Thoroughly: Always chill your dough to make it easier to handle and get clean edges on your Stained Glass Cookies.
Candy Selection: Use candies with similar melting points to ensure even bubbling and no overflow issues.
Cooling Patience: Let the cookies cool completely before storing to avoid sticking from the hardened candy centers.
You Must Know
- Stained Glass Cookies are best baked on parchment-lined sheets to prevent the melted candy from sticking.
- The candy centers harden quickly, so handle with care right after baking.
- This recipe yields about 24 cookies, depending on your cutter sizes.
- Avoid using soft candies; they won’t create the proper stained glass effect.
How to Store Stained Glass Cookies
To keep your Stained Glass Cookies fresh, store them in an airtight container at room temperature for up to one week—the candy centers stay shiny and intact. For longer storage, freeze them in a single layer between sheets of wax paper for up to a month; thaw at room temp before serving. If you notice any softening, a quick 5-minute warm-up in a 300°F oven revives the crispness perfectly.
Customizing Your Stained Glass Cookies
Feel free to swap in almond extract for vanilla to add a nutty twist to your Stained Glass Cookies, or mix in sprinkles for extra sparkle. For dietary needs, use gluten-free flour and dairy-free butter without losing that classic taste. Check out our lemon blueberry cookies recipe for citrus-inspired variations that pair well with these colorful gems.
What to Serve with Stained Glass Cookies
Pair these vibrant treats with a hot cup of herbal tea or spiced chai to balance their sweetness. For a dessert spread, serve alongside fresh fruit like berries or a light vanilla ice cream for dipping. They’re also wonderful with a cheese platter at parties, adding a pop of color and crunch.

Stained Glass Cookies Recipe
These stained glass cookies are so pretty and they're REALLY EASY to make. Impress your guests with these beautiful AND tasty sugar cookies!
Timing
Recipe Details
Ingredients
- 01 1 cup Sugar
- 02 1/2 teaspoon Salt
- 03 1 Tablespoon Vanilla extract
- 04 1 Egg (large)
- 05 3/4 cup Butter (room temperature)
- 06 2-1/2 cups Flour
- 07 16 Jolly ranchers
Instructions
Gather your cookie ingredients and supplies.
Add the sugar, salt, vanilla, egg, and room temperature butter to a mixing bowl.
Combine the ingredients in a stand mixer or with a hand mixer.
Add the all purpose flour and mix until the dough starts to clump together.
Transfer the dough to your working surface and knead briefly.
Cover your dough with plastic wrap and chill in the refrigerator for 1 hour.
Unwrap two jolly ranchers and place them in a plastic baggie.
Use a hammer or meat mallet to crush the jolly ranchers into very small pieces. Powder is okay as well, but try and get rid of any large chunks. Repeat with other jolly rancher colours. Two jolly ranchers will fill 3 - 4 cookies, depending on your cut out size.
Add flour to your working surface. Place the dough on top and add a bit more flour on top of the dough.
Roll out the dough until it's just over 1/4 inch thick.
Use a cookie cutter to cut out star shapes, or whatever shape you'd like!
Place the cookies on a parchment lined baking tray. You can also use a silicone mat, but you need to cover your baking sheet with something to stop the candy from sticking.
Cut out the centers of the cookies with a smaller cookie cutter of a similar shape.
Fill the center of the cookies with the crushed candies. Make sure they don't overflow; just add enough to cover the hole. Try and remove any pieces that fall on the top of the cookies prior to baking.
Preheat your oven to 350F and bake the cookies for 12 minutes. Allow the cookies to cool on the tray for 20 - 30 minutes, until the candy center has hardened.
Your stained glass cookies are complete!
FILED UNDER:
NUTRITION FACTS (PER SERVING)
Nutrition information is calculated using an ingredient database and should be considered an estimate. In cases where multiple ingredient alternatives are given, the first listed is calculated for nutrition. Garnishes and optional ingredients are not included.
Frequently Asked Questions About Stained Glass Cookies
Can I make Stained Glass Cookies ahead of time?
Yes, you can prepare the dough up to two days in advance and keep it chilled, or even freeze it for a month. Bake fresh for the best texture, though baked cookies store well too. It’s a great way to get a head start on holiday baking.
How long does Stained Glass Cookies last in the fridge?
Your Stained Glass Cookies will stay fresh in the fridge for up to two weeks in an airtight container. The candy centers might get slightly sticky, but they’re still delicious. Bring them to room temperature before enjoying.
Are Stained Glass Cookies gluten-free?
Not in the classic recipe, but you can easily adapt by using a 1:1 gluten-free flour blend. Test a small batch first to ensure the dough holds up. The results are just as stunning and tasty.
What if the candy doesn’t melt properly?
Ensure your oven is fully preheated, and use finely crushed Stained Glass Cookies candies of similar types. If needed, bake a minute longer, but watch to avoid burning. This usually resolves any melting issues.
Can kids help make Stained Glass Cookies?
Absolutely, crushing the candies is a fun, safe task for little ones with supervision. They love arranging the colors too. It turns baking into a family activity they’ll cherish.
How do I prevent Stained Glass Cookies from spreading?
Chilling the dough is key, along with baking on the middle rack. For more tips, see our best soft chocolate chip cookies recipe, which shares similar dough-handling advice. Your cookies will hold their shapes beautifully.
Can I use this dough for other shapes?
Yes, any cookie cutter works—think ornaments for holidays or florals for spring. Just ensure the center cutout is smaller for the candy to fill. Experimenting keeps things exciting.
What’s the calorie count for Stained Glass Cookies?
Each cookie is around 100-120 calories, depending on the candy used. They’re a treat worth savoring in moderation. For lighter options, reduce sugar slightly without affecting the stained glass magic.
Final Thoughts
From the first colorful bite to the last crumb, these Stained Glass Cookies bring joy and creativity to every baking session—I’ve lost count of how many times I’ve made them for friends and family. Whether you’re a seasoned baker or just starting out, this recipe will have you feeling like an artist in the kitchen. Give it a try this weekend and let me know how your Stained Glass Cookies turn out; I bet they’ll become your new favorite too!