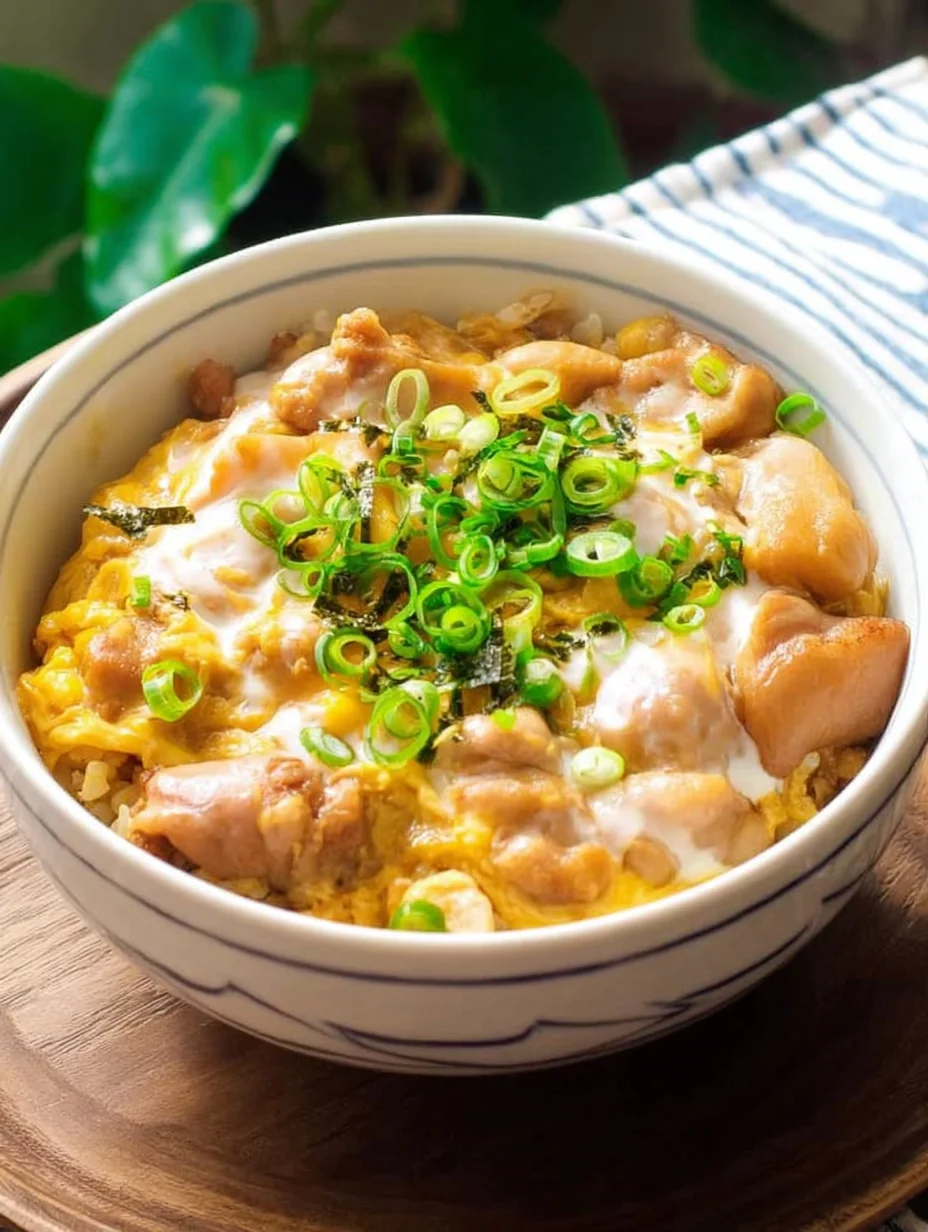
Have you ever craved a comforting bowl of food that transports you straight to the bustling streets of Tokyo? That’s exactly what happened to me the first time I tried Oyakodon, that iconic Japanese rice bowl featuring tender chicken, silky eggs, and sweet-savory onions all nestled over steaming rice. It’s one of those dishes that feels like a warm hug from your grandmother, but with a sophisticated twist that makes it perfect for weeknight dinners or impressing friends. In my experience, making Oyakodon at home is surprisingly simple, and once you get the hang of it, you’ll wonder why you ever ordered takeout.
What I love most about this Oyakodon recipe is how it balances those umami flavors without overwhelming your kitchen with hours of prep. I’ve tweaked it over the years to make it even more accessible, using pantry staples that you probably already have on hand. Whether you’re a newbie to Japanese cooking or a seasoned pro, this Oyakodon will quickly become a staple in your rotation. Let’s dive into how you can whip up this delicious Oyakodon yourself—trust me, it’s worth every bite.
Now, you might be thinking, “How does this fit into my busy schedule?” Well, here’s the thing: my version of Oyakodon comes together in under 30 minutes, making it ideal for those hectic evenings. I’ve even linked it to some of my other favorite chicken dishes, like this quick air fryer chicken recipe for variety, or the hearty creamy white chicken chili when you want something soupier. Get ready to savor every flavorful forkful of your homemade Oyakodon!
Grab This Chef Knife Now - Almost Gone!

- Stays Razor-Sharp: Ice-hardened blade keeps its edge longer than ordinary knives
- Superior Grip Control: Unique finger hole design gives you perfect balance and safety
- Built to Last a Lifetime: Premium stainless steel blade with elegant beech wood handle
- ✓ Finally, a knife that stays sharp and feels comfortable in my hand
- ✓ Professional quality without the premium price tag
- ✓ Makes meal prep faster and more enjoyable
⏰ Only a few items left in stock - order soon
Key Takeaways:
- Oyakodon offers a perfect blend of chicken, egg, and rice for a satisfying, protein-packed meal that’s ready in minutes.
- It’s a time-saver, requiring just one skillet and basic ingredients you likely have in your fridge.
- The savory-sweet taste of this Oyakodon will have you coming back for seconds every time.
- Use fresh eggs and high-quality soy sauce for the silkiest texture in your Oyakodon.
- Store leftovers in an airtight container for up to two days to keep your Oyakodon fresh.
Why You’ll Adore This Oyakodon
Quick and Effortless Prep: Imagine coming home after a long day and having a hot, homemade meal on the table in less than half an hour—that’s the magic of this Oyakodon. It’s so straightforward that even on your laziest cooking days, you’ll feel like a culinary whiz. We all need those easy wins, right?
Burst of Authentic Flavors: The combination of tender chicken and runny eggs in a glossy sauce is pure comfort food heaven. I’ve made this Oyakodon countless times, and each bite reminds me why Japanese home cooking is unbeatable—it’s hearty yet light, savory with just the right touch of sweetness. You’ll be hooked after the first try, I promise.
Versatile for Any Meal: Whether it’s breakfast, lunch, or dinner, this Oyakodon fits right in without fuss. It’s nourishing and filling, perfect for fueling your day or winding down at night. What I find interesting is how it pairs so well with simple sides, making it a go-to for meal prepping too.
Budget-Friendly Delight: Using everyday ingredients like eggs and chicken thighs means this Oyakodon won’t break the bank. Let’s be honest, in today’s world, affordable meals that taste gourmet are a game-changer. Plus, it’s healthier than most takeout options, giving you that feel-good vibe after eating.
Grab This Kitchen Scale Now — Best Precision Pick!

- Razor-Accurate Every Time: Dual-increment precision down to 0.1g — perfect for baking, meal prep, and portion control with g, oz, ml, and fl'oz modes.
- Smart Removable Bowl Design: Detachable bowl doubles as a protective case for compact storage. Tare function lets you weigh ingredients in any container with zero fuss.
- Built for Everyday Convenience: Auto-zero, tare function, low battery alert, overload indicator, and 2-minute auto-off to extend battery life — all in a sleek stainless steel build.
- ✓ "Perfect for baking — precise, lightweight, and stores easily without wasting counter space"
- ✓ "A game changer! Weighing ingredients is now way more accurate than measuring cups"
- ✓ "Love the 0.1g precision and backlight — best food scale I've owned. Highly recommend!"
⏰ Only a few items left in stock - order soon
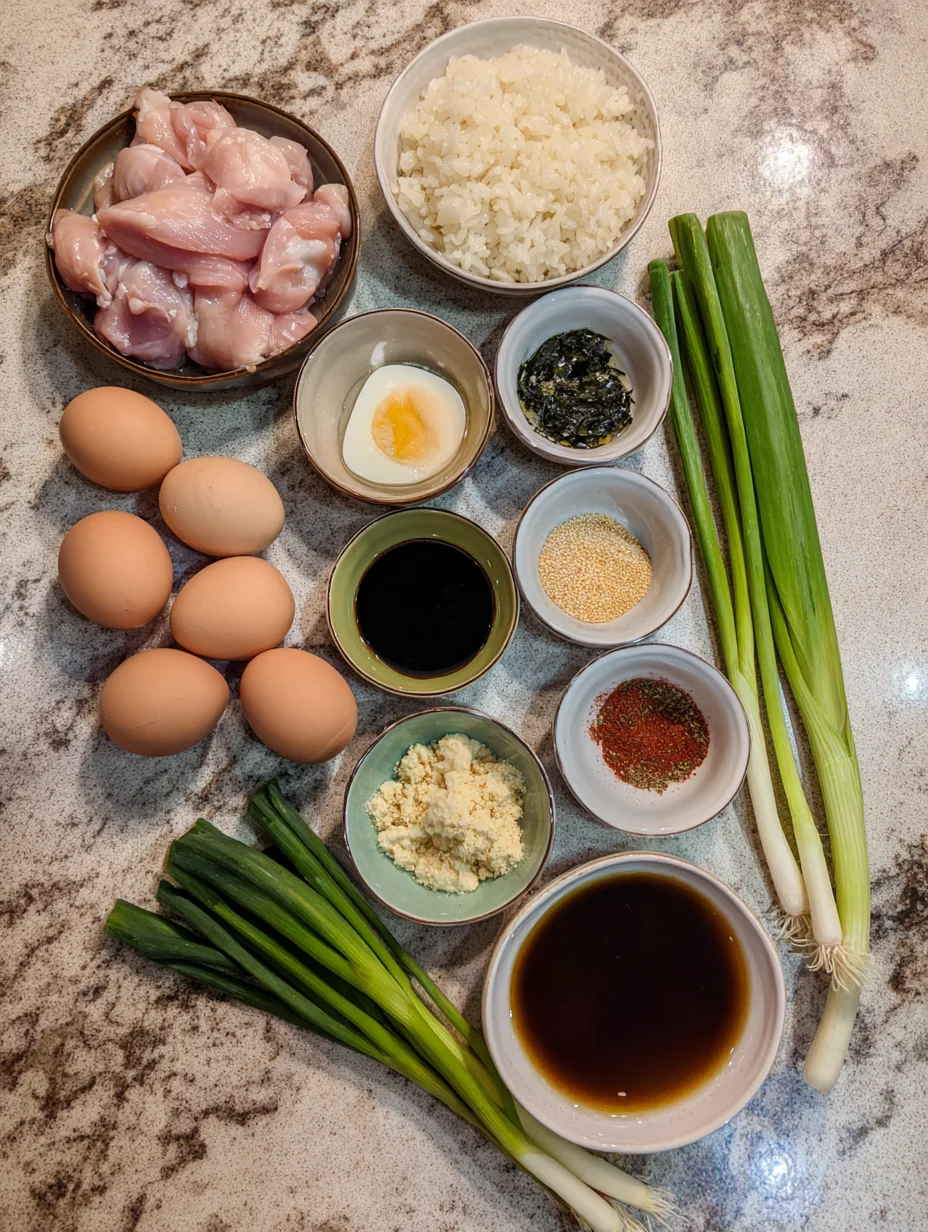
Essential Ingredients for Oyakodon
Chicken Thighs: These boneless, skinless chicken thighs are the star of the show, providing juicy, flavorful bites that soak up the sauce beautifully. I always opt for thighs over breasts in my Oyakodon because they stay tender and don’t dry out during cooking. They’re affordable and easy to find, making them ideal for this quick recipe. Slice them thinly for even cooking and maximum sauce absorption.
Eggs: Fresh eggs are crucial for that creamy, custardy texture that defines a great Oyakodon. They gently poach in the simmering sauce, creating soft curds that mingle with the chicken and onions. In my experience, using room-temperature eggs helps them cook more evenly without overcooking. Beat them lightly just before adding to preserve their silkiness.
Onions: Sweet yellow onions add a subtle crunch and natural sweetness to your Oyakodon, balancing the savory elements perfectly. They’re sliced thinly and cooked until translucent, releasing their juices into the broth for deeper flavor. What I love is how they caramelize slightly, elevating the entire dish without extra effort. Don’t skip them—they’re what makes Oyakodon authentic.
How to Make Oyakodon
Prepare the Base Broth
Start by combining dashi, soy sauce, mirin, and sake in a small bowl to create the flavorful broth that will tie your entire Oyakodon together—it’s the secret to that glossy, umami-packed sauce. In a skillet over medium heat, bring this mixture to a gentle simmer, allowing the flavors to meld beautifully. This step only takes a couple of minutes, but it’s worth it for the depth it adds to the dish. I’ve found that tasting and adjusting the sweetness here makes all the difference in the final Oyakodon.
Cook the Chicken and Onions
Slice your chicken thighs into thin strips and add them to the simmering broth along with the thinly sliced onions, stirring occasionally as the chicken turns opaque and tender—expect this to take about 5-7 minutes. The onions will soften and release their sweetness, filling your kitchen with an irresistible aroma that promises a delicious Oyakodon ahead. Keep the heat medium to avoid boiling too vigorously, which could toughen the meat. Sensory-wise, you’ll see the broth bubbling gently and smell that comforting savory scent building up.
Add Eggs and Finish the Dish
Now, pour in the lightly beaten eggs in a slow stream, swirling the pan to create those soft, ribbon-like curds that are the hallmark of perfect Oyakodon—let it cook undisturbed for 1-2 minutes until just set. The eggs should be silky and slightly runny, not overcooked, for the best texture. Spoon this glorious mixture over hot steamed rice in bowls, garnishing with chopped green onions for a fresh pop. Your homemade Oyakodon is ready to serve, warm and inviting. For a twist, check out this garlic parmesan chicken skewers recipe if you want to experiment with chicken flavors.
Ingredients
- 2 boneless, skinless chicken thighs, sliced thinly
- 2 large eggs, beaten
- 1 medium yellow onion, thinly sliced
- 1 cup dashi broth
- 2 tablespoons soy sauce
- 2 tablespoons mirin
- 1 tablespoon sake
- 2 green onions, chopped for garnish
- 2 cups cooked Japanese short-grain rice
- Salt and pepper to taste
Oyakodon Instructions
- In a small bowl, whisk together dashi, soy sauce, mirin, and sake. Set aside.
- Heat a large skillet over medium heat. Add the sliced onions and cook for 2-3 minutes until softened.
- Add the chicken slices to the skillet and pour in the broth mixture. Simmer for 5-7 minutes until chicken is cooked through.
- Pour the beaten eggs over the chicken in a circular motion. Cover and cook for 1-2 minutes until eggs are just set.
- Divide the cooked rice between two bowls. Top with the chicken and egg mixture.
- Garnish with chopped green onions and serve immediately.
Pro Tips for the Best Oyakodon
Slice Evenly for Uniform Cooking: Cut your chicken and onions to the same thickness to ensure everything cooks at the same rate in your Oyakodon.
Use a Wide Skillet: This allows the eggs to spread out nicely, creating those perfect soft curds without crowding.
Fresh Dashi Makes a Difference: If you can, use homemade or high-quality instant dashi for the most authentic flavor in your Oyakodon.
You Must Know
- Oyakodon translates to “parent and child,” referring to the chicken and egg combo—it’s a classic Japanese comfort food.
- The dish originated in the late 19th century and is a staple in Japanese diners called teishoku.
- Always use low heat for the eggs to prevent them from becoming rubbery in your preparation.
- Serve Oyakodon hot over rice for the best experience, as it loses some appeal when cooled.
How to Store Oyakodon
To keep your Oyakodon fresh, transfer leftovers to an airtight container and refrigerate promptly—it’ll stay good for up to two days. Avoid freezing, as the eggs can become watery upon thawing, altering the texture you love. When reheating, gently warm in a skillet over low heat with a splash of water to revive the sauce, or microwave in short bursts, stirring halfway. This way, your Oyakodon maintains that comforting warmth without drying out.
Customizing Your Oyakodon
Feeling adventurous? Swap chicken for pork or tofu to make a vegetarian version of this Oyakodon, keeping the sauce ratios the same for balanced flavors. Add mushrooms or spinach during the simmering step for extra veggies and nutrition without complicating things. If you’re spice-loving, a dash of chili oil before serving amps up the heat. For more chicken variation ideas, check out this melt-in-your-mouth chicken recipe to inspire your twists.
What to Serve with Oyakodon
Pair your Oyakodon with a simple miso soup and pickled vegetables for an authentic Japanese meal that feels complete and light. Fresh green salad with sesame dressing adds crunch and balances the richness, while steamed edamame brings a pop of protein on the side. For drinks, go with green tea to cleanse the palate or a crisp sake if you’re feeling festive. These accompaniments elevate your Oyakodon without overpowering its delicate flavors.

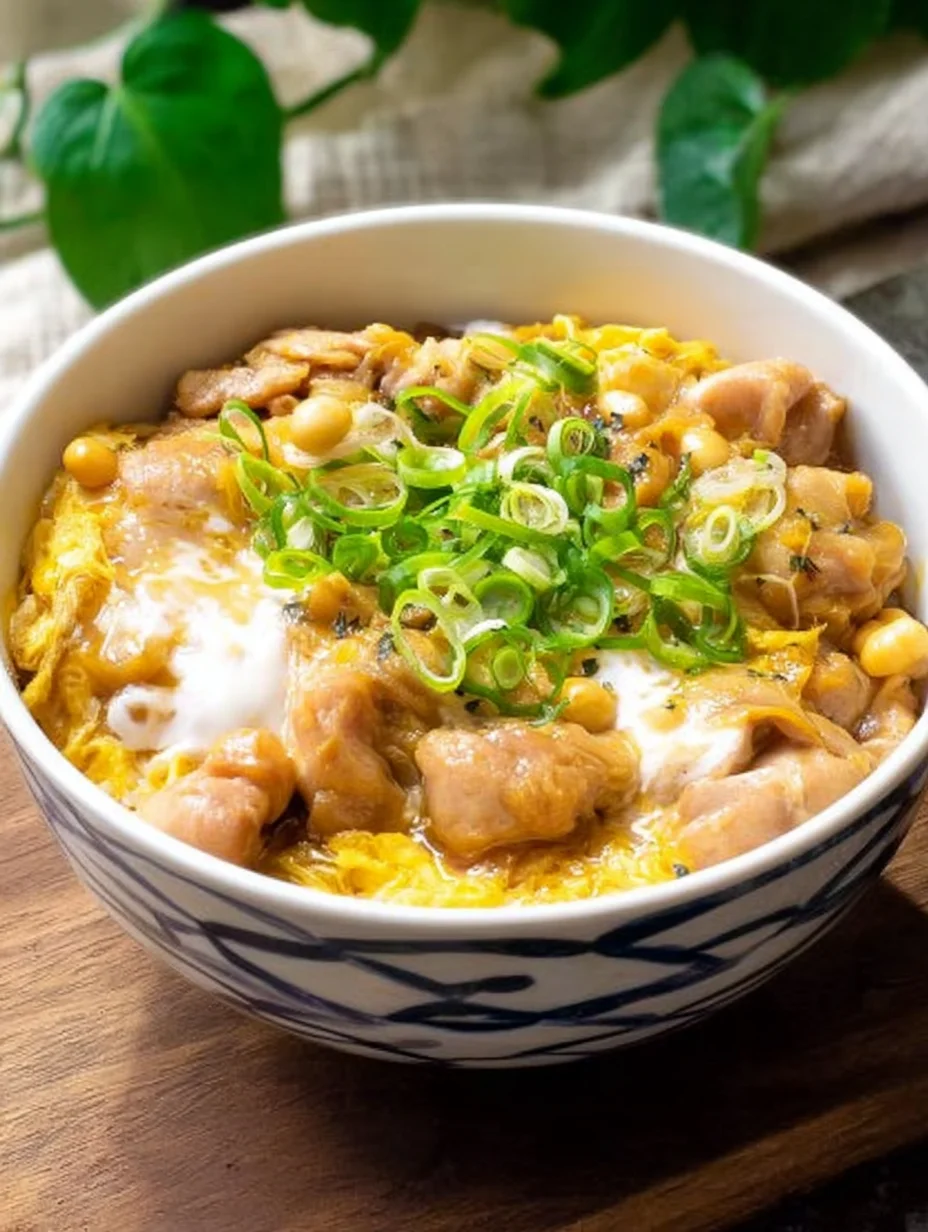
15-Minute Oyakodon (Japanese Chicken & Egg Rice Bowl)
This quick & easy Oyakodon features tender pieces of chicken simmered in a sweet and savory broth and wrapped in a soft egg scramble to be served over a warm bed of rice. This simple & delicious donburi comes together in a single pan in just a few minutes, making it the ideal comfort meal for the weekdays.
Timing
Recipe Details
Ingredients
- 01 150 g skinless boneless chicken thighs (cut into small pieces)
- 02 1/2 medium onion (sliced)
- 03 1/2 cup chicken stock (or dashi)
- 04 1 tbsp soy sauce (or more to taste)
- 05 1 tbsp mirin
- 06 1 tsp sugar
- 07 2 large eggs
- 08 1 1/2 cup cooked rice (to serve)
- 09 green onion, sesame oil, nori and/or togarashi (optional, for garnish)
Instructions
Combine chicken, soy sauce, mirin, and sugar in a bowl and set aside for 5-10 minutes while preparing the other ingredients.
To prepare the egg mixture, crack the eggs into a bowl and gently break the yolks using a pair of chopsticks. You want to make sure the eggs are lightly beaten with the egg whites still visible.
In a small pan, bring chicken stock to a boil over medium heat. Add onion and cook until aromatic, about 1 minute. Add the chicken mixture and cook for about 1-2 minutes on each side.
When the chicken is almost cooked through, pour the egg mixture evenly into the pan and cook for a few seconds until the edges are nearly set.
Lightly scramble the eggs and cook for a few seconds more until the eggs are still a bit runny - the residual heat will continue to cook the eggs. Serve over a bowl of rice, garnish and enjoy!
FILED UNDER:
NUTRITION FACTS (PER SERVING)
Nutrition information is calculated using an ingredient database and should be considered an estimate. In cases where multiple ingredient alternatives are given, the first listed is calculated for nutrition. Garnishes and optional ingredients are not included.
Frequently Asked Questions About Oyakodon
Can I make Oyakodon ahead of time?
While Oyakodon is best enjoyed fresh, you can prep the broth and chop ingredients a few hours in advance to save time. Assemble and cook right before serving to keep the eggs soft and the rice hot. In my experience, any longer wait can make the texture less appealing.
How long does Oyakodon last in the fridge?
Oyakodon keeps well in the refrigerator for up to 2 days when stored properly in an airtight container. Beyond that, the eggs may firm up too much. Reheat gently to avoid overcooking.
What is traditional Oyakodon served with?
Traditionally, Oyakodon is served over steamed Japanese rice in a donburi bowl, often with green onions on top for freshness. It’s a standalone meal, but sides like pickles enhance it. This simple presentation highlights the dish’s comforting essence.
Is Oyakodon gluten-free?
Yes, your Oyakodon can be gluten-free if you use tamari instead of soy sauce and ensure your dashi is made without wheat. Always check labels, as some mirin varieties contain gluten too. This swap keeps the flavor intact while making it suitable for gluten-sensitive eaters.
Can I use chicken breast for Oyakodon?
Chicken breast works, but thighs are preferable for their juiciness in Oyakodon. If using breast, slice thinly and don’t overcook to prevent dryness. Thighs give that authentic tender bite everyone loves.
How spicy is Oyakodon?
Oyakodon isn’t spicy at all—it’s savory and slightly sweet from the mirin. The focus is on umami from the soy and dashi in this classic Oyakodon. Add shichimi togarashi if you crave heat.
What’s the calorie count for Oyakodon?
A standard serving of Oyakodon is around 500-600 calories, depending on rice portion and egg size. It’s balanced with protein from chicken and eggs, making it a hearty yet moderate meal.
Can Oyakodon be made vegan?
Absolutely, replace chicken with tofu or mushrooms and use egg substitutes like chickpea flour for the custard in your Oyakodon. The sauce remains the same, so flavors stay true. It’s a great way to adapt this dish for plant-based diets.
Final Thoughts
There’s something truly special about wrapping up a meal with a bowl of Oyakodon—it’s simple, soul-warming, and packed with those flavors that linger in your memory. From the first simmer to the last bite, this recipe has brought joy to my table time and again, and I know it’ll do the same for you. So, grab those ingredients and give this Oyakodon a whirl; you won’t regret it. Share your results in the comments—I’d love to hear how it turned out!